Podman Local
Info
This method is supported by Plumber community.
Caution
Only for testing purposes on your local computer
This page describes how to quickly setup a self-managed instance of Plumber for testing purposes using podman on your local computer. This is not suitable for production
💻 Requirements
- GitLab instance version >=17.7
- Git
- podman
- Docker hub registry must be resolved by podman in file /etc/containers/registries.conf
unqualified-search-registries = ["docker.io"]🛠️ Installation
🦊 Create GitLab Application
On your GitLab instance, open the
Applicationspage:Your picture > Preferences > Applications(example: gitlab.com)Create an application with the following information :
- Name:
Plumber self-managed - Redirect URI :
http://localhost:3001/api/auth/gitlab/callback - Confidential:
true(let the box checked) - Scopes:
api
Click on
Save Applicationand you should see the following screen: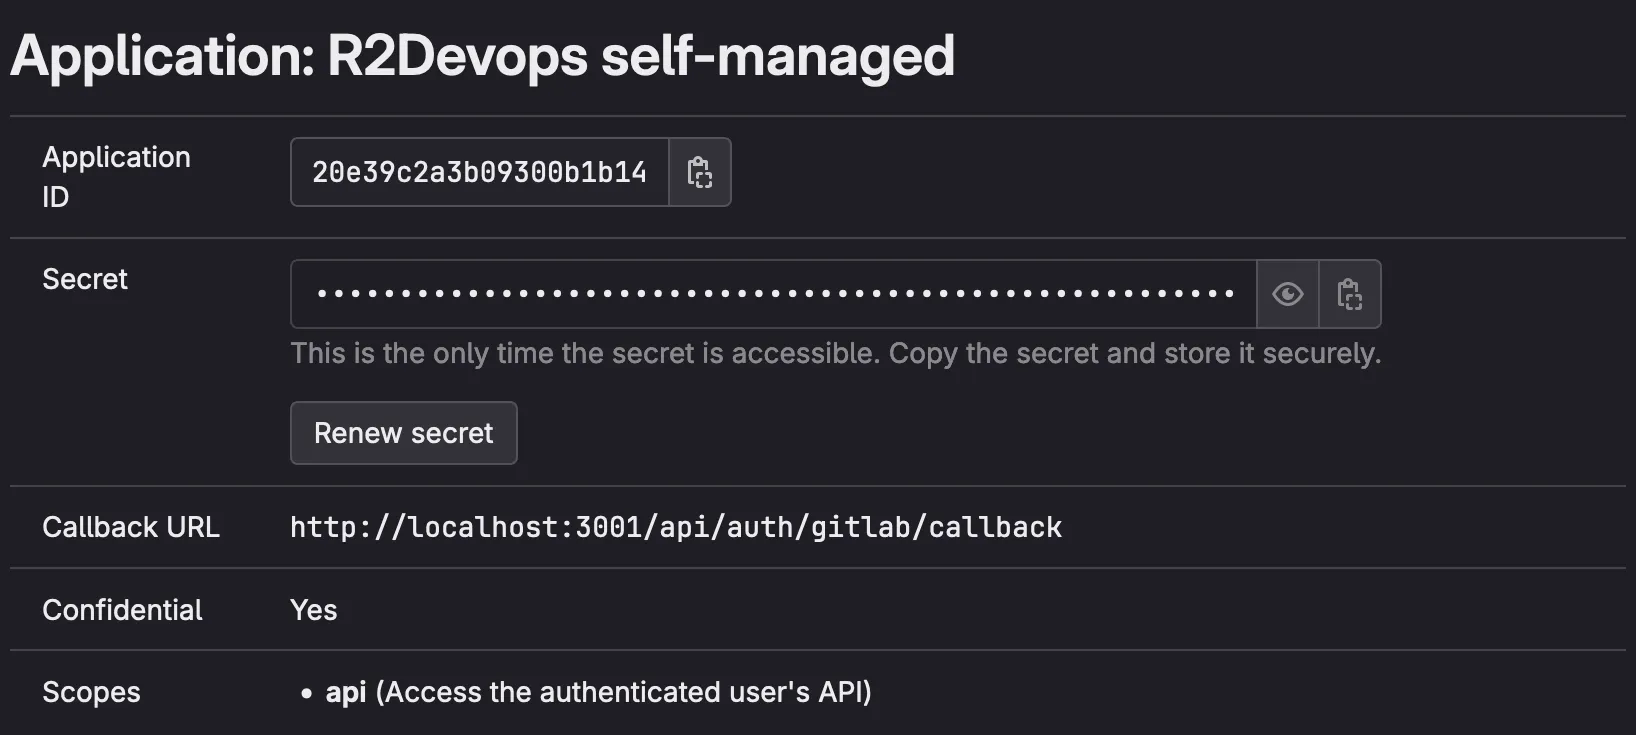
Keep this GitLab tab open, the
Application IDandSecretwill be used in the configuration step- Name:
📥 Setup your environment
Clone the repository locally
Terminal window git clone https://github.com/getplumber/platform.git plumber-platformcd plumber-platformCreate your configuration file
Terminal window cp .env.local.example .env📚 Update the configuration
Edit the
.envfile:Copy/paste the
Application IDand theSecretfrom the GitLab application you just created.env GITLAB_OAUTH2_CLIENT_ID="<application-id>"GITLAB_OAUTH2_CLIENT_SECRET="<application-secret>"Replace
<your-gitlab-url>by domain of your GitLab server.env JOBS_GITLAB_URL="https://<your-gitlab-url>"If you want to connect Plumber to a specific GitLab group only: add the path of the group in
ORGANIZATIONvariable (to run the onboarding, you must be at least Maintainer in this group).env ORGANIZATION="<group-path>"If you want to connect Plumber to the whole GitLab instance: let the
ORGANIZATIONvariable empty (to run the onboarding, you must be a GitLab instance Admin).env ORGANIZATION=""
Run the following commands to generate random secrets for all components:
Terminal window sed -i "s/REPLACE_ME_BY_SECRET_KEY/$(openssl rand -hex 32)/g" .envsed -i "s/REPLACE_ME_BY_JOBS_DB_PASSWORD/$(openssl rand -hex 16)/g" .envsed -i "s/REPLACE_ME_BY_JOBS_REDIS_PASSWORD/$(openssl rand -hex 16)/g" .env📄 Prepare podman for launch
Generate podman network:
Terminal window podman network create intranetGenerate podman socket
Terminal window systemctl --user start podman.socketsystemctl --user enable podman.socketGenerate podman config files:
Terminal window set -a; source .env; set +aexport uid=$(id -u)envsubst < podman.local.yml.example > podman.ymlenvsubst < configmap.local.yml.example > configmap.yml🚀 Launch Plumber!
Start Plumber
Terminal window podman play kube podman.yml --configmap configmap.yml --network intranetOpen your Plumber test instance 👉 click here 🎉
⏫ Update Plumber
Follow these steps to update your self-managed instance to a new version:
Navigate to the location of your
platformgit repositoryUpdate it
Terminal window git pullOpen the
.env.local.examplefile and copy the values ofFRONTEND_IMAGE_TAGandBACKEND_IMAGE_TAGvariablesEdit the
.envfile by updating values ofFRONTEND_IMAGE_TAGandBACKEND_IMAGE_TAGvariables with the values previously copied.env FRONTEND_IMAGE_TAG="<new frontend version>"BACKEND_IMAGE_TAG="<new backend version>"Update local yaml files
Terminal window set -a; source .env; set +aexport uid=$(id -u)envsubst < podman.local.yml.example > podman.ymlenvsubst < configmap.local.yml.example > configmap.ymlRestart your containers
Terminal window podman play kube podman.yml --replace --configmap configmap.yml --network intranetYou have successfully updated Plumber on your server 🎉